I don’t have to sit here and stress the importance of Google Maps. Being that the mobile app has a billion+ users, chances are that you’ve already use
I don’t have to sit here and stress the importance of Google Maps. Being that the mobile app has a billion+ users, chances are that you’ve already used it extensively and know how valuable it can be for everyday life. That said, such a long-standing and crucial app from Google has naturally gone through a multitude of development over the years. Sure, the core functionality of panning the world, viewing details of places, and checking current traffic conditions is well understood by the majority. But there’s actually a lot more there than meets the eye, and these are not just minuscule features.
This list covers features that you may not know about that you may want to.
Location Sharing
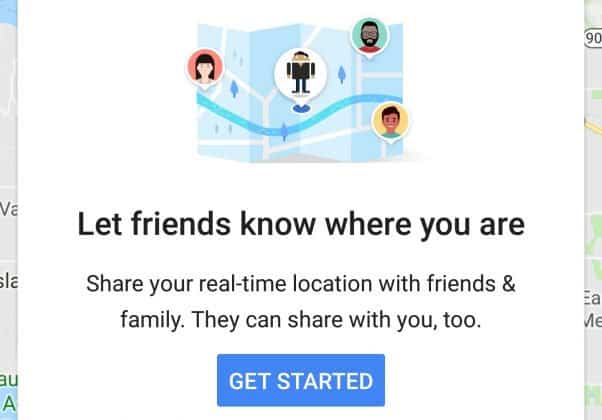
Google has dabbled with Location Sharing quite a bit, but it’s unfortunately been mostly backseat feature. If you haven’t used it, as the name implies, it’s a way to positionally connect with someone of your choice (if it’s mutually desired). For instance, I use this with my wife when we’re traveling and we temporarily separate. Instead of having to figure out how to meet up again, she or I can simply see each other on the map and one or the other can get there.
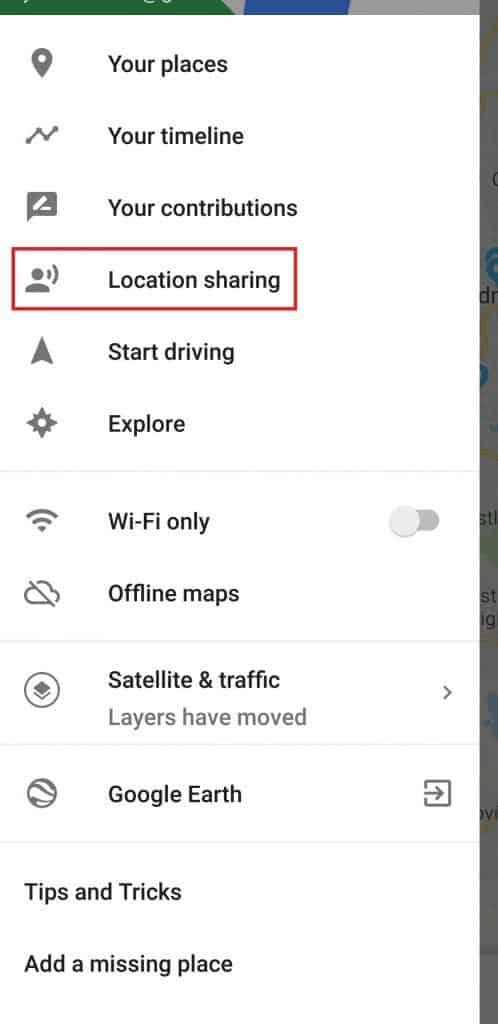
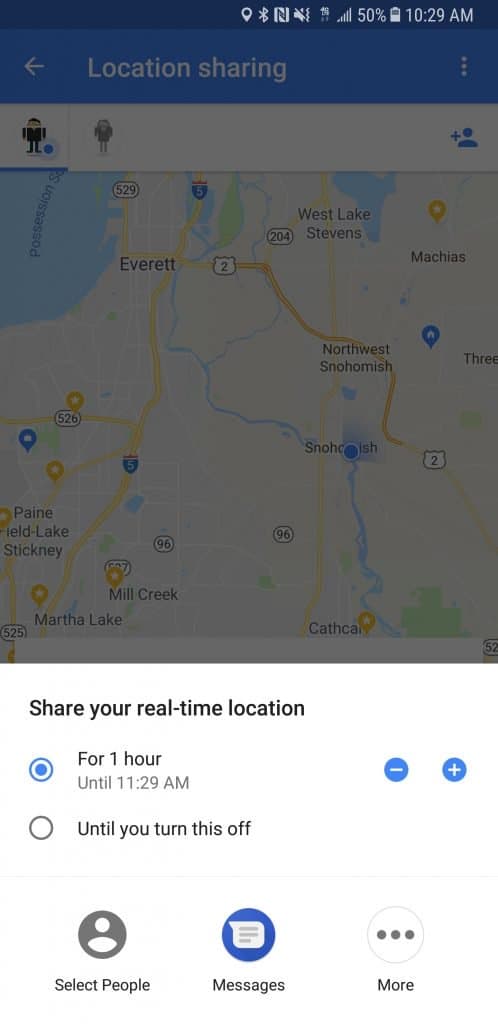
The feature used to be on Hangouts (Google’s internet messaging app). I guess the logic at the time was that since the app connected people, location was another form of communication. However, Google eventually migrated Location Sharing to Google Maps. It’s simple to access and use. Just pull out the left hand menu (by swiping from the left edge), select Location Sharing from the list, and then tap Get Started.
Now bear in mind that this is to make your location aware to someone of your choice. To get mutual location sharing, the person will have to do the same from their end. To activate, you select one of your contacts. You also select how long you want your location to be visible to them (either a certain amount of time or stay active until you turn it off).
*Extra Tip: You can additionally share your transit details. For instance, when you start a drive and directions via Navigation, you can share your destination, ETA, and where you currently are on the route. Pretty neat, huh?
Useful Gestures
I bet that most Google Maps users only use the universally common gestures like pinching to zoom in/out and long-pressing to tag a specific location, but there are a couple more worth knowing that aren’t obvious. One that I personally immediately adopted once learning is the ability to zoom in/out with just one hand. This may not sound like a big deal, but when you’re tied up and have only one hand available at the moment, it can be a crucial maneuver.
It’s weird to learn how to do it at first, but eventually becomes natural. You’ll double tap the screen, but instead of releasing the second tap, you’ll want to hold it (otherwise, you’ll just end up zooming in). It doesn’t look like anything has happened, but then try sliding your finger up and down (without lifting from the screen). Voila! Sliding up zooms out and sliding down zooms in.
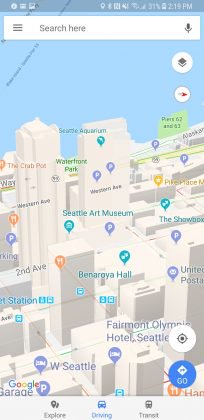
Two others (which are probably more known) are the extra gestures with two-finger operation. You can change the default top view to an angle of your choice by swiping two fingers up and down. When you’re zoomed in enough into a city, you’ll see building heights as Maps has 3D information of certain areas. Rotating the view (rotating your two fingers) becomes more helpful as your flying around observing the topography. The future is great, isn’t it?
Parking Location
You may have stumbled on the ability in Maps to label and save a specific place of your own. This is an important feature, as you can store several places that matter most to you for quick access and for recognition in the Google Cloud. For instance, a saved location for your “Home” or “Work” make things easy when you go to ask Google Assistant something like, “How’s my commute to work this morning?” or “Navigate home”.
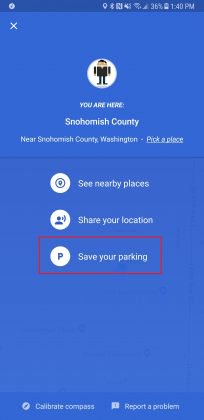
But an additionally useful feature along these lines is the ability to quickly tag your parking location when you’re out and about. Everyone has run into that annoying occurrence where you can’t pin-point the exact spot you left your car, especially in a large parking lot, where you’re weaving through aisles frantically clicking your car remote to hear an indication.
It’s easy to save a parking location, but once you know how to get to the menu (this isn’t exactly obvious). On the map, click the blue dot that signifies where you are in the world – that opens up a full-screen menu. Here, you’ll see the option “Save your parking”. You’ll then see a pin placed on the map at your location with the letter “P”. Voila.
If needed, you can click the pin and edit the location (or hit Clear when you want to dismiss it). You can also add useful notes to it, like which floor your car is on if it’s in a parking garage or how much time you have left.
Offline Maps
I mostly use the Offline Maps feature in Google Maps when I go on vacation. You don’t know how the internet signal situation is in other places, and especially if you’re road tripping to Timbuktu, you don’t want to risk getting lost with no assistance. Just imagine having to make human contact to ask for directions. The horror!
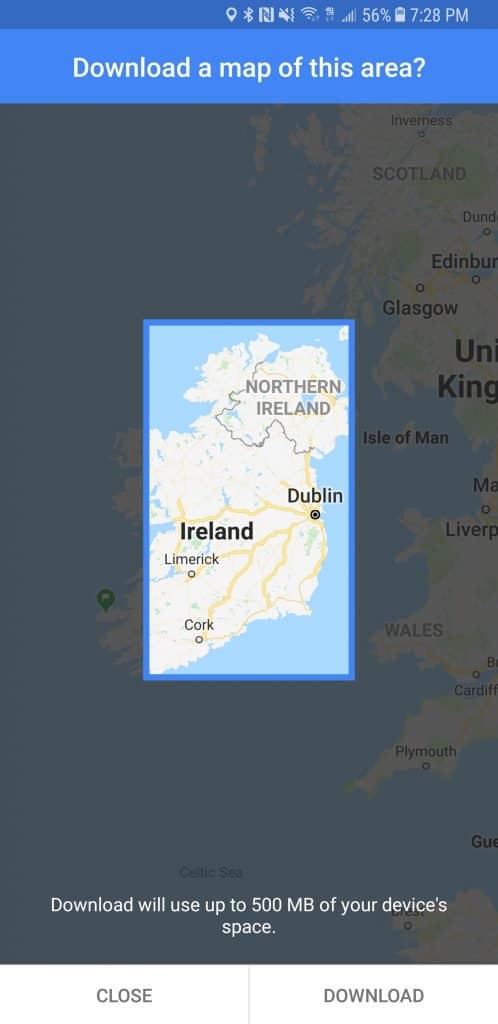
If you’ve never used this feature, there’s a couple things you need to be aware of. First, there’s a max window size of an area you can save at a time. You’re essentially downloading the terrain information, so it may take a chunk of space (the max can range by a few hundred megabytes depending the area). So if you want to cover more area than it allows in one go, you’ll have to save it in divided sections. Fortunately, Offline Maps lets you nicely organize lists of saved areas and name them as you please.
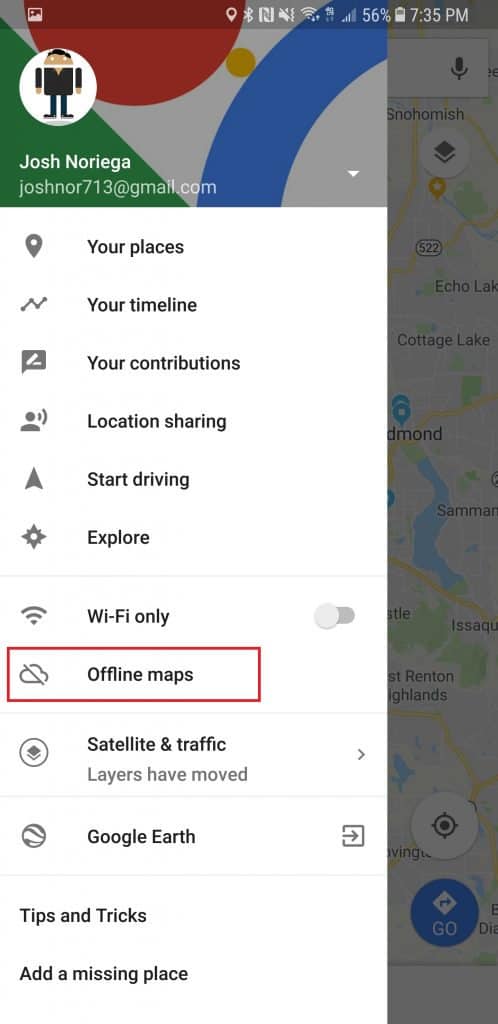
To access the feature, simply pull out the main Maps menu from the left edge and you’ll see the “Offline Maps” button. You’ll see your saved areas listed here. To make a new one, click “Select you own map” and zoom in/out the area you want and hit Download. It will download onto the list and from there you can edit it (i.e. rename, delete).
If you’re worried about space, Google nicely has the option to download the information to an SD card (assuming your phone supports it – sorry Pixel owners). It’s also important to know that Google has an automatic system in place to clear saved areas after a period of time. This is probably because they can significantly impact your storage reserves. Be sure to update them regularly if you want to keep them.
Explore
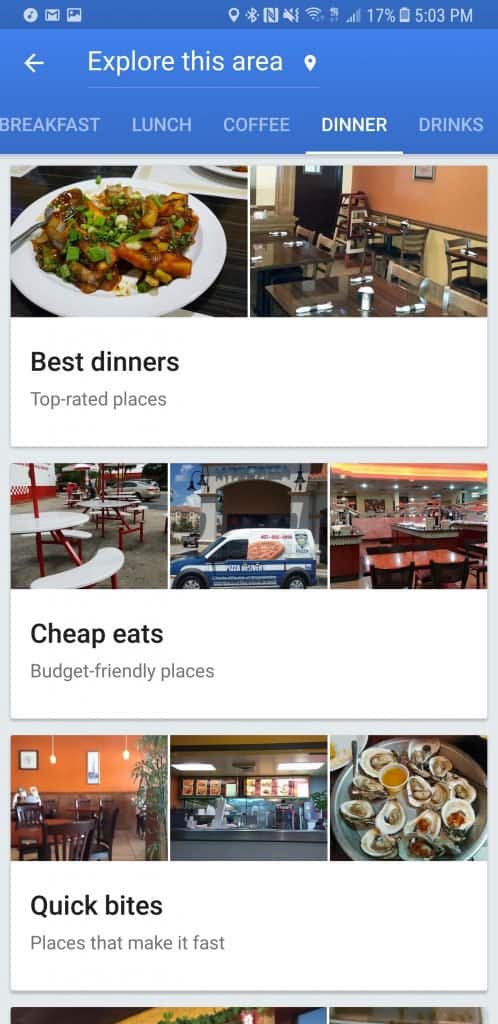
One valuable feature that I admittedly forget to use but shouldn’t is the Explore button at the bottom of the app. There’s more there than meets the eye. The basic functionality is, within any area that your map is currently looking at, it will very quickly retrieve hot spots in that area to eat and drink among several categories. This feature is tuned more towards consumption, but you can also quickly pull up gas stations, ATMs, Pharmacies, and Grocery stores that are in the area in question. This tool can be particularly valuable when you’re on a trip and the area is new to you.
A trick to get to a full-screen layout of the nearby restaurant options is to scroll to the end of what’s summarized on the launch page; you’ll see a “More” button. There, you’ll see the food types laid out along the top, and you can more easily scroll through the categories of suggestions. Another benefit in this area is that at the very bottom it will point out several areas of interest in the area you’ve picked, but it’s minimally supported. We don’t know why there isn’t an “attractions” category in the Explore function. Hopefully Google adds it in the future.
Hope these tips were beneficial to you. Happy mapping!

COMMENTS