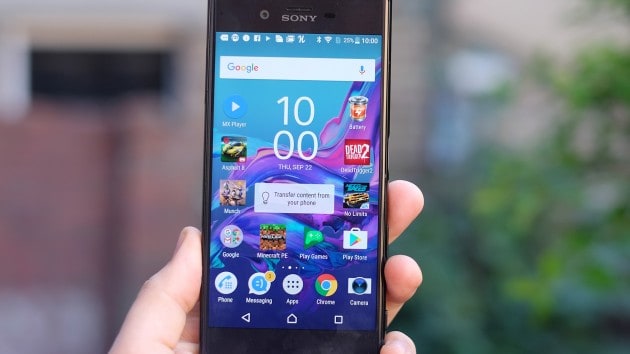
This tutorial is about how to root Sony Xperia XZ phone on Android 6.0 Marshmallow firmware. Sony pushed its limits when they released the Xperia XZ.
This tutorial is about how to root Sony Xperia XZ phone on Android 6.0 Marshmallow firmware. Sony pushed its limits when they released the Xperia XZ. It packs everything that a smartphone lover would want in a handy device. It packs triple imaging sensor technology with an upgraded camera sensor and a couple of more tricks up its sleeve. Moreover, Sony customized OS of this phone perfectly compliments it in every way. Making it stable and fast no matter what the conditions or how much processor heavy tasks you do on it. This phone simply amazes you with what it can achieve. If this is your first time, read benefits of rooting your phone. We will be using SuperSU package to root Xperia XZ phone.
For this tutorial, you will need to have TWRP Recovery installed on your phone. As you continue reading, our guide will explain how you can root Sony Xperia XZ on Android Marshmallow. Even with all these technologies technologies crammed inside a slick body, some people, mostly modders and developers wouldn’t be satisfied and would want to go an extra mile to achieve more with this already brilliant device. To do that, one must root its device in order to access hidden aspects of one’s smartphone and modify it to its limits. Please make sure you backup your data before proceeding with the tutorial, to make sure you do not lose anything. Rooting process is quite easy of you follow each and every step carefully. So, lets begin with the tutorial.
Disclaimer: All the custom ROMs and firmwares, official software updates, tools, mods or anything mentioned in the tutorial belong to their respective owners/developers. We (TeamAndroid.com) or the developers are not to be held responsible if you damage or brick your device. We don’t have you on gun point to try out this tutorial.
Root Xperia XZ – SuperSU Root Package Details:
SuperSU is one of our favourite rooting packages as it comes with all the binaries needed to gain root access on your different Android phones. Not just this, the SuperSU app is much more robust and comes with better features than the previously popular Superuser app.
Please note, this tutorial to root Sony Xperia XZ requires you to have an unlocked bootloader and TWRP custom recovery installed on your Xperia XZ in order to be able to root your phone. If you do not have the custom recovery installed, we have a link to the tutorial given below.
Plus, you need to make sure your phone has been downgraded to Android Marshmallow. You should be on Marshmallow instead of the Android Nougat firmware if you have already unlocked the bootloader of your Sony Xperia XZ.
How to Root Sony Xperia XZ on Official Firmware
We have put together a detailed step-by-step instructions guide on how to root Sony Xperia XZ with SuperSU. Please read every line carefully below. We suggest that you should read the tutorial once before actually performing it on your phone.
We have instructed to use TWRP recovery for this tutorial. However, if you have another recovery installed that allows you to flash ZIP files, you can also use that.
Prerequisites:
In order to successfully root Xperia XZ, you must do the following things:
- Unlock Bootloader of your Xperia XZ.
- Install a custom recovery like TWRP Recovery.
Instructions:
Step 1 – Download SuperUser zip file on your computer.
Step 2 – Put the downloaded zip file in the root of your device’s SD Card or Internal Storage.
Step 3 – Reboot to Recovery mode by press and holding ‘Volume Down’ and ‘Power Button’.
Step 4 – Now select install and navigate to the downloaded SuperSU image. Swipe to flash. Wait for it to complete.
Step 5 – Once flashing is complete, reboot into your phone’s OS and check if SuperUser is present under your App Drawer. If yes then your phone is successfully rooted.


COMMENTS